I know a lot of people don't like Valentine's Day, but single or taken I've always loved it. Holidays were a reason to dress up, have a special breakfast (pink milk anyone?) and get presents in my house growing up. I looked around for a cute Valentine's Day shirt for Blondie Boy but I literally didn't see one child's Valentine's shirt, so I took matters into my own two hands!
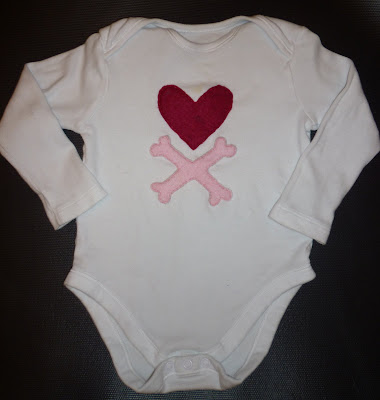
I like to think Blondie Boy's style is as punk rock as a 13 month old boy can get so I immediately thought of putting an edgy twist to a normally pink and fluffy holiday. I love anything with skulls so I drew out a pattern for a heart and crossbones.

I free hand every pattern I make- sometimes it takes a few trys, but it's definitely better to screw up a pattern then to waste fabric. I just use a bit of thick paper (or an ad for DFS in this case) so it pins on nicely to the fabric without ripping and then trace around it and cut out.
Normally I just use fabric glue but I decided to challenge myself and hand-stitch the edging. I was a bit worried since I knew there was no chance of each stitch being even in length and spacing, but I kind of like the kitchy homemade feel it brings. I won't lie it did take me almost an hour and a half to stitch, but I think it was worth it.

I can't wait to try it on Blondie Boy tomorrow maybe with a faux-hawk and a jean jacket and have a photoshoot while he dances around to some Social D.
I also made a rose corsage for Blondie Boy's Grandma as she and her fiancé
were kind enough to babysit him while NotBlondeHusband and I went out for a Valentine's date on Saturday. I found the tutorial
here and it was slightly time consuming, but really simple to follow. It is for a ring but I just made the circles slightly larger for a corsage.
 I hope y'all have a wonderful Valentine's Day!


 Discovery Boxes: These are the term I've given to a toddler version of the baby treasure baskets. Every now and then I collect some simple materials such as cardboard tubes and beans, sellotape and scoops and put them into a large box for the girls to get stuck into! As with the treasure baskets, the idea is to step back and watch them play without interfering or suggesting what they should do, only joining in if asked. I find they can stay engaged with these simple items for so much longer than with their usual toys and they spend a lot of time thinking, collaborating, experimenting and having great fun! I've got a collection of the different items we have put into our Discovery Boxes on my site, if you need some more ideas!
  Musical Instruments: Following along the same principles as the treasure baskets and discovery boxes, it is so easy to put together some makeshift musical instruments for plenty of hands-on experimenting with noises and sounds! Music making is crucial for building listening skills, distinction and perception and investigating cause and effect. It's also one of the vital building blocks for pre-reading so that one day they will be able to hear and distinguish sounds in words, pick up rhythm and hear intonation. Making "music" is as simple as opening the kitchen cupboards to pull out the pans, wooden spoons and metal utensils! Then have a great bash-a-long to some nursery rhymes or chants! If you want something more "sophisticated" you can make shakers easily using dry rice or pasta in a plastic bottle, stretching a balloon over a tin can for a drum or even make your own rain sticks!
  Messy Play: Last (but probably BEST!) comes the delightful messy, sensory play! Again, no money is really needed for this apart from a few essentials from the kitchen cupboard. Make your own play dough and keep it for 6 months or more, using it to strengthen hand muscles and as a tool for learning letters, numbers and more. Making Goop like Blondie did is cheap and easy, too. Create sensory tubs filled with dry rice, pasta, lentils, pom poms and allow your little one to investigate with hands, scoops and spoons. (Watch smaller toddlers so that they don't put anything in their mouths.) Other ideas for investigating in deep table trays are water, sand, shaving cream, jelly, wood shavings, beads and lego! Whatever you have on hand will be of interest!


